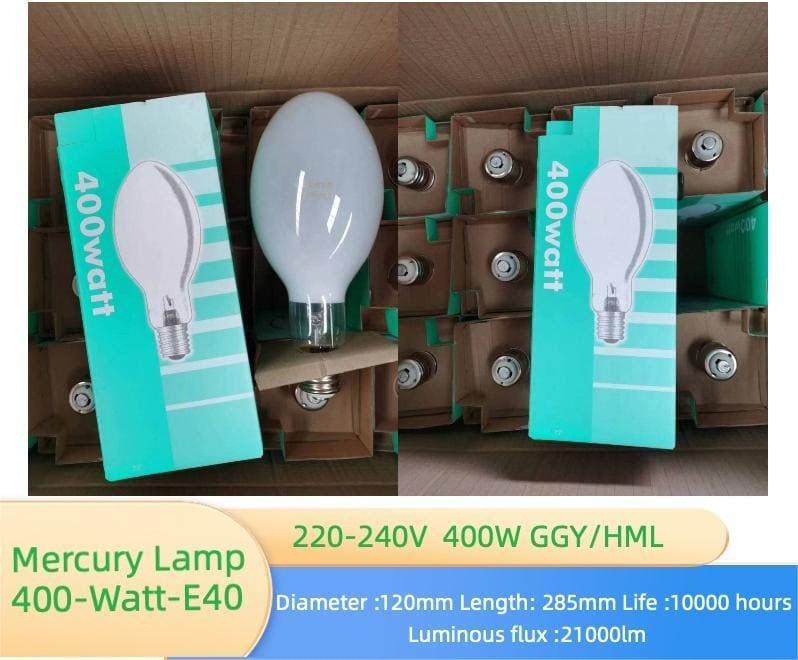
Mercury vapor lamps have been a popular and reliable choice for outdoor and industrial lighting for a long time because they are durable and produce a lot of bright light for a long time. However, it’s important to connect a mercury light bulb properly to operate it safely and effectively. If you do it wrong, you could have it not work, be unsafe, or even damage the bulb or the lighting fixture. I’ll walk you through how to connect a mercury light bulb step by step.
To connect a mercury light bulb, you need to put in a MV ballast that works with it, connect the wires from the bulb to the power, and make sure everything is tight and grounded. Be careful and follow the steps.
Let’s go through, step by step, how to connect a mercury light bulb.
Understanding Mercury Light Bulbs and Their Requirements
Before getting into the installation process, it’s important to understand the nature of mercury vapor lamps and their specific requirements. Mercury vapor lamps are a type of high-intensity discharge (HID) lamp that produces light by passing an electric arc through vaporized mercury. These lamps are commonly used in outdoor lighting applications, such as in street lamps, parking lots, industrial facilities, and landscapes.
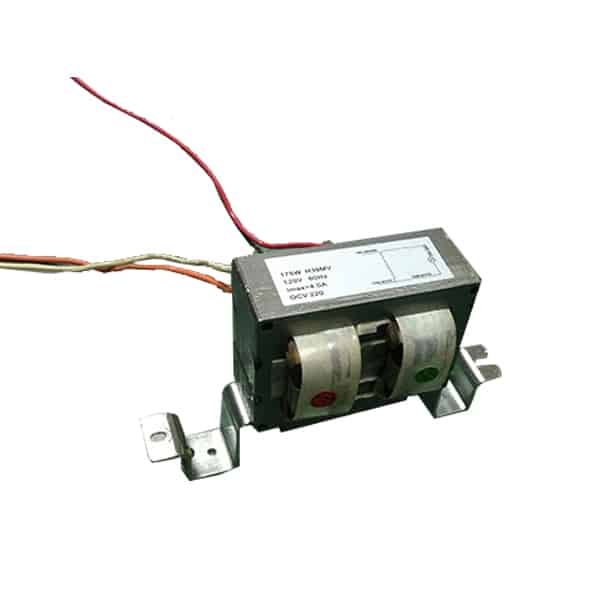
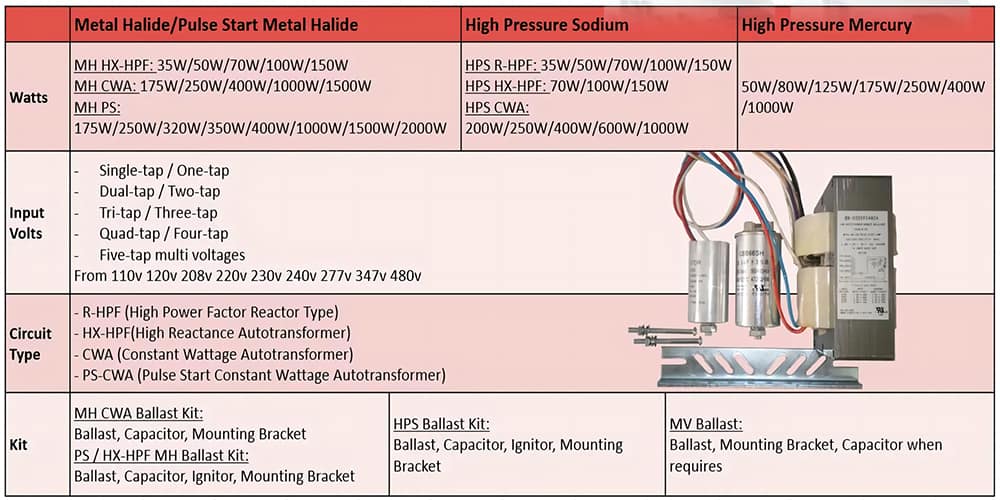
One of the most critical components in the operation of a mercury vapor lamp is the MV ballast. The ballast regulates the electrical current flowing to the lamp, ensuring that the bulb receives the correct amount of power to ignite and maintain light production. Without a proper ballast, the bulb could be overpowered, leading to damage or a significantly shorter lifespan. Additionally, mercury vapor lamps require specific light fixtures that can handle their high wattage and voltage needs.
Understanding the basic components and requirements of mercury vapor lamps helps ensure that the installation process goes smoothly, reducing the risk of malfunction or hazards.

Gathering Necessary Tools and Equipment
Before you begin, make sure you have all the necessary tools and equipment for installing your mercury light bulb. Here is a list of what you will need:
- Mercury Light Bulb: Ensure the bulb’s wattage matches the requirements of your fixture and ballast. Common wattages include 175 watts, 250 watts, and 400 watts.
- Ballast: A compatible light ballast is essential. The ballast must match the bulb’s wattage and the voltage of the power supply (e.g., 120V, 208V, 240V, or 277V).
- Light Fixture: The fixture should be designed for mercury vapor lamps, rated for the bulb’s wattage, and should be compatible with the ballast.
- Wiring Tools: You’ll need wire strippers, screwdrivers, electrical tape, and wire nuts to secure the connections.
- Voltage Tester: This is a crucial tool for ensuring that the circuit is de-energized before you start working, preventing accidental electric shocks.
Before starting, double-check that all of the components are compatible. Incompatibility between the bulb, ballast, or fixture can lead to inefficient performance or safety issues. Also, make sure that the wiring is grounded properly and that the correct wire gauge is used.
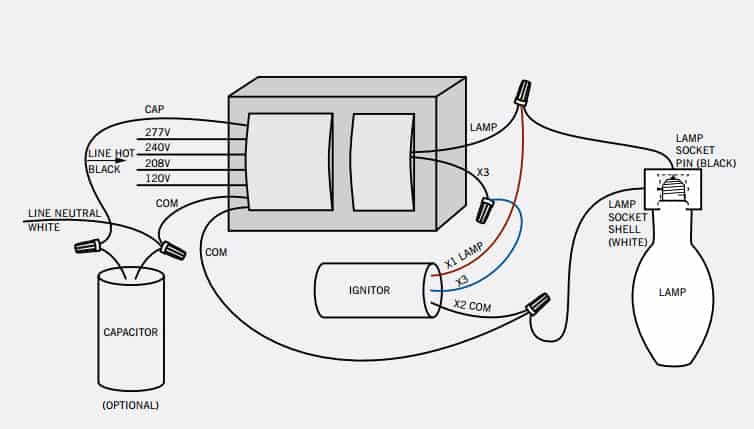
Step-by-Step Guide to Connecting a Mercury Light Bulb
1. Turn Off the Power
Safety first! Before you begin any work, make sure that the power to the lighting circuit is turned off. Locate the correct breaker in your electrical panel and switch it off. Use a voltage tester to ensure that there is no live current in the wires where you will be working. This step is crucial to avoid electrical shocks and ensure a safe installation.
2. Install the Ballast
If your light fixture doesn’t already have a ballast installed, this will be the first step in the connection process. The ballast is responsible for controlling the voltage and current to the bulb, ensuring it operates efficiently.
- First, identify the input and output wires on the ballast, which are usually color-coded (black for live, white for neutral, and green or bare for ground).
- Connect the input wires from your power source to the input terminals of the ballast.
- Then, connect the output wires from the ballast to the lamp’s socket. Be sure to follow the manufacturer’s wiring diagram to ensure the correct connections are made.
Most mercury vapor ballasts have multiple voltage taps (e.g., 120V, 208V, 240V, or 277V). Select the tap that corresponds to your power supply. Make sure the connections are secure, and use wire nuts and electrical tape to insulate the wires properly.
3. Connect the Wiring
Next, it’s time to connect the wiring between the fixture and the ballast. Here’s how:
- Strip the ends of the wires using a wire stripper to expose about half an inch of wire.
- Connect the live (black) wire from the power source to the live input of the ballast. Secure the connection using a wire nut.
- Connect the neutral (white) wire to the neutral terminal of the ballast.
- Attach the ground (green or bare) wire to the grounding screw in the fixture and ballast. Proper grounding is critical for safety.
Once all the connections are made, double-check that everything is tight and secure. Any loose wires can cause malfunctions or pose an electrical hazard.
4. Insert the Mercury Light Bulb
Now that the wiring is complete, screw the mercury vapor light bulb into the socket. Be careful not to touch the glass of the bulb with your bare hands. Oils from your skin can create hot spots on the bulb, leading to premature failure. It’s best to handle the bulb with a clean cloth or gloves.
5. Test the Wiring and Connections
Before restoring power, use a voltage tester to check that there are no live wires exposed. Ensure that all the connections are properly insulated and secure.
6. Restore Power and Test the Light
Once everything is securely connected, turn the power back on at the circuit breaker. Switch on the light and allow the mercury vapor bulb to warm up. These bulbs take a few minutes to reach full brightness, so be patient while it starts.
If the bulb does not light up, double-check all connections to ensure that the wiring is correct and secure. If the issue persists, the ballast or bulb may need to be inspected for faults.
Common Mistakes to Avoid
When connecting a mercury light bulb, several common mistakes can lead to malfunction or safety risks. Here are a few pitfalls to watch out for:
- Using an incompatible ballast: The ballast must match both the voltage and the wattage of the mercury vapor lamp. Using the wrong ballast can cause the bulb to flicker, burn out prematurely, or not work at all.
- Failing to ground the wiring: A proper ground connection is essential for safety. Without grounding, there is a risk of electrical shock or damage to the system.
- Not turning off the power: Always ensure that the power is off before starting any electrical work. Failing to do so could result in serious injury or even death.
- Touching the bulb with bare hands: Oils from your skin can damage the bulb and reduce its lifespan. Always handle the bulb with gloves or a clean cloth.
Maintaining Your Mercury Light Bulb
Once the mercury vapor lamp is installed, regular maintenance can help prolong its lifespan and ensure optimal performance. Here are a few tips for keeping your system in good condition:
- Clean the fixture regularly: Dust and dirt can accumulate on the fixture and bulb, reducing light output. Periodically clean the fixture and bulb with a soft, dry cloth.
- Monitor the bulb for signs of wear: Over time, mercury vapor lamps tend to lose brightness. If the light seems dimmer than usual, it may be time to replace the bulb or ballast.
- Replace the ballast when needed: Ballasts can degrade over time. If the lamp flickers or fails to start, the ballast may need to be replaced.
Regular maintenance ensures that your mercury vapor lamp operates at peak efficiency, providing bright and reliable lighting for years.
Final Words:
Connecting a mercury light bulb requires attention to detail and safety. If you follow these steps and use the tools I’ve mentioned, you’ll be able to install your mercury light bulb safely and correctly. Always make sure the bulb, mercury ballast, and fixture are compatible and watch for the common mistakes I’ve mentioned.

