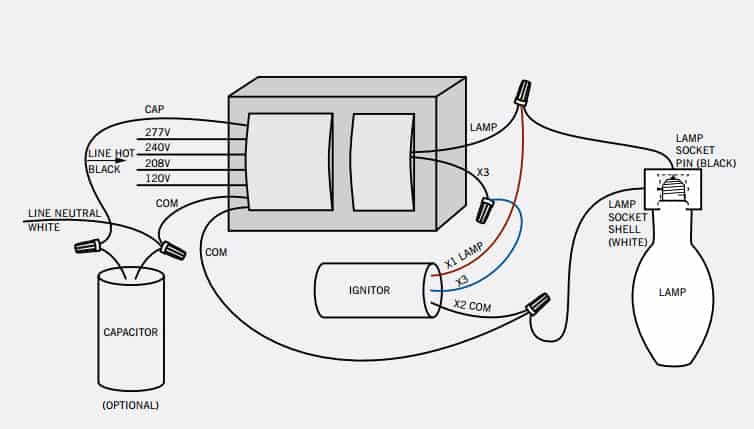
If you don’t understand how to wire a pulse start ballast, you could make mistakes that would cause your system not to work. Use the wiring diagram to make sure you install it correctly.
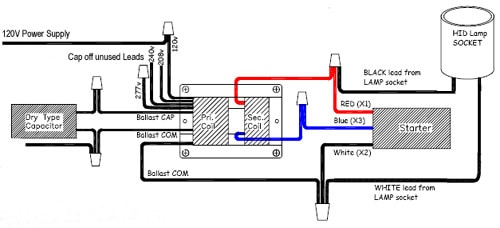
A pulse start ballast wiring diagram shows you how to connect the ballast, ignitor, capacitor, and lamp together to make your system work. It also shows you where to connect the ground and power supply.
Knowing these wiring details will help you make your system work and make it more efficient.
What Is a Pulse Start Ballast?
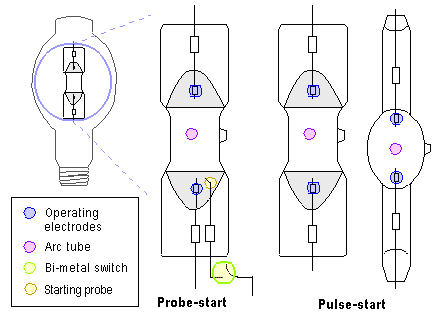
A pulse start ballast is designed to power high-intensity discharge (HID) lamps such as metal halide and high-pressure sodium lamps. Unlike older probe-start ballasts, which use an internal electrode to ignite the lamp, pulse start ballasts rely on an external ignitor. This ignitor sends a series of high-voltage pulses to the lamp electrodes, initiating the arc needed to produce light.
Pulse start ballasts offer several advantages over probe-start systems. They reduce warm-up time, enhance lamp efficacy, and increase the overall lifespan of the lamp. This makes pulse start ballasts a preferred choice for commercial and industrial applications where reliable lighting is critical.
Components of a Pulse Start Ballast System
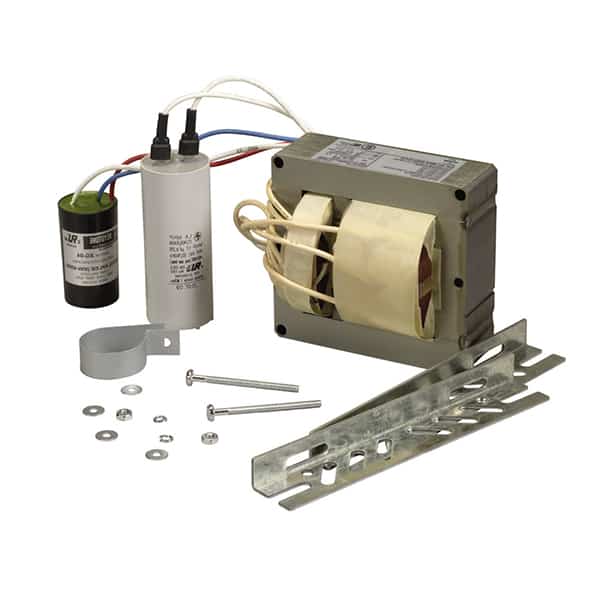
The main components of a pulse start ballast system include the ballast, ignitor, capacitor, and the lamp itself. Each of these plays a vital role in the system’s operation.
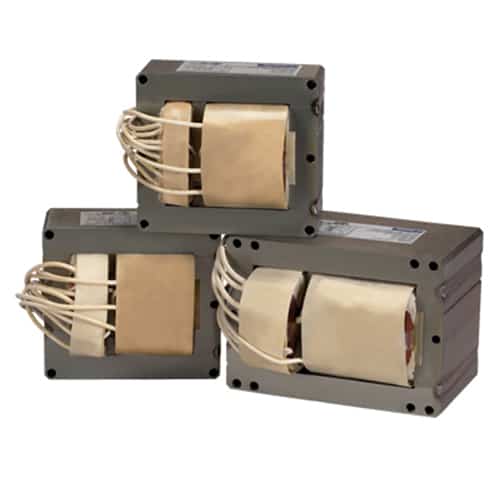
- Ballast: The ballast regulates the flow of current to the lamp. It ensures that the correct amount of current is delivered during both the startup and operation phases.
- Ignitor: The ignitor provides the high-voltage pulses necessary to start the lamp. These pulses eliminate the need for a starting electrode inside the lamp, leading to faster ignition.
- Capacitor: The capacitor helps stabilize the power flow, ensuring that the lamp operates consistently without fluctuations in current.
Properly installing each of these components is crucial to ensuring that the lighting system functions efficiently.
How to Read a Pulse Start Ballast Wiring Diagram
A pulse start ballast wiring diagram details the connections between the power supply, ballast, ignitor, and lamp. These diagrams include the specific wiring for both input and output, helping technicians understand how to connect each component.
For example, the diagram will show how to connect the ballast to the power supply and the lamp, ensuring the proper flow of electricity. The ignitor is typically placed between the ballast and the lamp to provide the necessary high-voltage pulses for ignition. The wiring diagram will also indicate where grounding and fuse protection should be implemented for safety.
Wiring a Pulse Start Ballast: Key Steps
Wiring a pulse start ballast correctly involves several key steps. First, the ballast must be connected to both the power source and the lamp. The ignitor should be wired between the ballast and the lamp, ensuring that it can deliver the high-voltage pulse needed to start the lamp.
It is essential to follow the specific wiring diagram provided by the ballast manufacturer to avoid errors. Miswiring can result in the lamp failing to start, or worse, damaging the ballast or other components. Proper grounding is also critical, as it helps prevent electrical shorts and ensures the safety of the entire system.
Differences Between Pulse Start and Probe Start Ballasts
The main difference between pulse start and probe start ballasts lies in how they ignite the lamp. Probe start ballasts use a starting electrode inside the lamp, which can lead to slower starts and reduced lamp life. Over time, the starting electrode deteriorates, reducing the lamp’s efficiency and longevity.
Pulse start ballasts, on the other hand, use an external ignitor to deliver high-voltage pulses directly to the lamp electrodes. This eliminates the need for a starting electrode inside the lamp, allowing for faster starts, greater energy efficiency, and longer lamp life. Pulse start ballasts are also more reliable in colder temperatures.
How Does Pulse Start Wiring Impact Lamp Performance?
Correct wiring of a pulse start ballast is crucial for optimal lamp performance. Improper wiring can lead to flickering, premature failure of the lamp, or damage to the ballast. When the wiring is correct, the ignitor can deliver the necessary high-voltage pulses to start the lamp efficiently, which leads to a longer lifespan and consistent lighting performance.
In addition, proper wiring helps maintain the overall efficiency of the system, reducing energy consumption and ensuring that the lamp produces its maximum light output.
Can You Use Pulse Start Lamps with Probe Start Ballasts?
Pulse start lamps are not compatible with probe start ballasts because they require an external ignitor to start the lamp. Probe start ballasts lack this component, so they are unable to generate the necessary high-voltage pulses required by pulse start lamps.
Attempting to use a pulse start lamp with a probe start ballast can lead to improper ignition, resulting in damage to both the lamp and the ballast. Always match the correct lamp type to its corresponding ballast to ensure compatibility and proper operation.
Common Wiring Mistakes and How to Avoid Them
One of the most common mistakes when wiring a pulse start ballast is misconnecting the ignitor. If the ignitor is wired incorrectly, the lamp may fail to start, or it could cause damage to the entire system. Another frequent issue is improper grounding, which can lead to electrical shorts or equipment failure.
To avoid these mistakes, it is important to carefully follow the manufacturer’s wiring diagram. Ensuring that all connections are tight and secure will also help prevent wiring errors. Additionally, always double-check that the lamp type matches the ballast before installation.
Why Choose Pulse Start Ballasts for HID Lighting Systems?
Pulse start ballasts are an ideal choice for HID lighting systems because they provide faster startup times, improved energy efficiency, and longer lamp life. These benefits make pulse start ballasts well-suited for large-scale commercial and industrial applications, where lighting must be reliable and cost-effective.
Additionally, pulse start systems perform better in colder environments, making them ideal for outdoor lighting in colder climates. They are also more efficient in terms of energy usage, which reduces operating costs over time.
Troubleshooting Pulse Start Ballast Wiring Issues
When troubleshooting a pulse start ballast system, the first step is to check the wiring connections. Ensure that the ignitor is correctly wired and that the lamp is compatible with the ballast. If the lamp does not start, voltage testing may be required to determine whether the ballast is receiving power and whether the ignitor is functioning properly.
In some cases, replacing faulty components like the ignitor or capacitor may be necessary to restore the system to full working order. Regular maintenance and periodic inspections can help prevent common wiring and component issues.
Final Words:
A pulse start ballast wiring diagram is important to properly install and operate your HID lighting system. This will make your system more efficient and last longer.

